My Kindle 3 started freezing a few minutes after I booting up. This started after I ran the battery down completely; but the battery appeared to charge fine, and swapping batteries did not fix it. Following the advice of this blog post from SiliconFish, I ordered a couple of broken-screen Kindles from ebay ($10 including shipping for the paid).
Swapping the motherboards is pretty easy. Pull the back off gently. You can do this without any tools, just bend a corner, gently and gradually, until the back pops out at that corner. Then peel the back out, again gently and gradually, and all the clip-points will pop out. Remove the two screws holding in the battery and remove the battery.
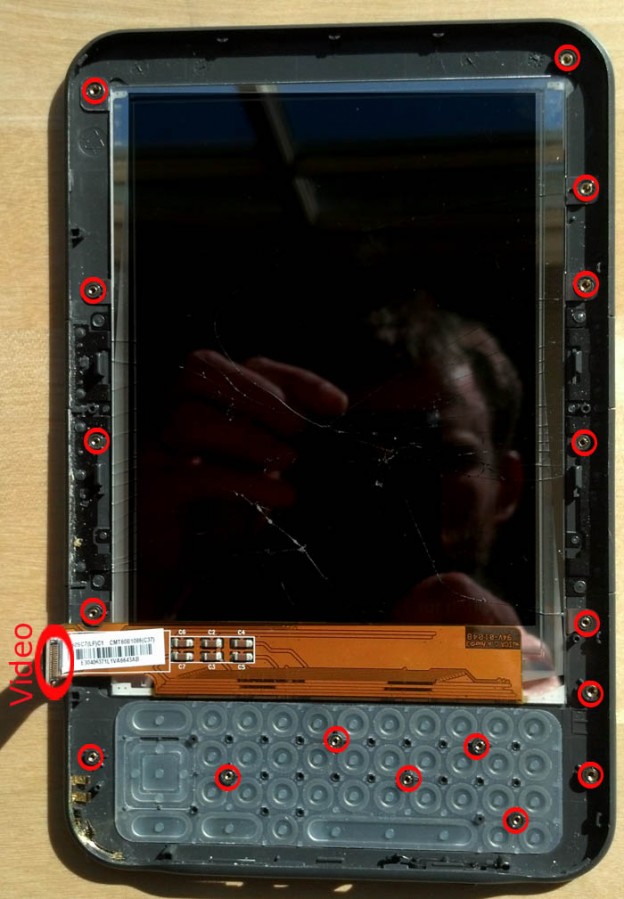
There are a bunch of screws on the back, some small and dark and others large and silvery. You can’t see it while the motherboard is still in, but only some of them need to be removed. This picture of the screen and front-case assembly (glued together) shows where they are located:

Once you remove those screws and the video connector, the motherboard should come off fairly easily in your hand, although the power switch and other connections at the bottom may stick a little. Repeat the process for the broken-screen kindle, and combine the good parts from the broken-screen kindle with the frozen-motherboard kindle, and voila, working kindle.
Leave a Reply